Project Description:
The Ledge Village is series of 3D buildings and accessories that can be combined in a mix and match fashion to build tiny villages on small ledges around your home. The buildings are thin, with all detail on the front so they fit on small trim ledges. This tutorial is for a winter tree, especially for those using Ledge Village to create Christmas Villages.
I did the tree in two different colors and two different styles. This tutorial explains how to use this same cutting file to make either a flat-backed tree for Ledge Village displayed on a skinny ledge, or a free-standing tree for a Ledge Village displayed on a wider surface.
- 3D Fullerton House • Tutorial
- 3D Tower House • Tutorial
- 3D Haunted Mansion • Tutorial
- 3D Fire Station • Tutorial
- 3D Store 2 and Park Bench • Tutorial
- 3D Dormer House • Tutorial
- 3D Train Station • Tutorial
- 3D Backyard Necessities - Outhouse and Swing • Tutorial
- 3D Store and Gazebo File • Tutorial
- 3D Barn File • Tutorial
- 3D School House File • Tutorial
- 3D Church File • Tutorial
- 3D Cottage File • Tutorial
- 3D Two Story House File • Tutorial
- 3D Greek Revival House File • Tutorial
Winter Tree Tutorial
Tutorial assembled using Silhouette Software Release 2.7.18. This tutorial assumes you already know how to use the Silhouette and Silhouette software.
Supplies Needed:
- Template from Silhouette On-Line Store here .
- Glue dots 3/16"
- Silhouette Cameo or Portrait
- Card Stock
Steps for completing the Winter Tree:
1. Download the cutting file for your Silhouette Cutting machine from the Silhouette Online Store here.
2. Prepare the files:
- The downloaded Silhouette file for the Winter Tree looks like this. You need to decide what type of tree you need.
- Cut 4 patterns if you want the free-standing tree.
- Cut 3 patterns if you want the flat-backed ledge tree.
- The settings will depend on the paper you use. I have been using white index card stock and cutting at a speed of 3, a depth of 33 and the blade set to 3.
- Your blade and cutting mat need to be in good shape to cut detailed patterns like this one.
- Carefully remove the cut files from the backing mat.
To make the flat-Backed Tree for display on a ledge:
- Cut three of the tree patterns and fold two along the dotted fold line in the same direction.
- Leave one flat.
- Put glue tabs on the trunk and larger branches of one of the folded halves. Do not glue the crown of the tree together.
- Place this on the flat tree piece being sure to carefully align the bottoms.
- Repeat with the second half of the tree.
- Your three trees will be glued together and look like this from the bottom.
- Press the center open.
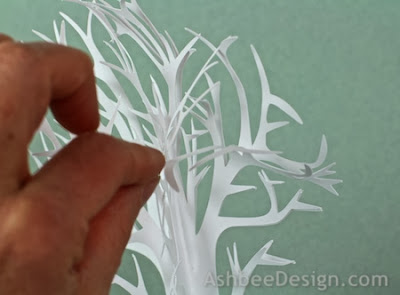
- Bend the branches to better fill out the crown and to help space the trunk wing pieces keeping the back piece flat.
To make the 3D tree for free-standing:
- Cut four of the tree patterns and fold two along the dotted fold line in the same direction.
- Fold all in half, two going one direction and two going the other.
- Make sure the bottoms meet evenly.
- Only glue the trunks and main branches. Leave all the crown unglued.
- Glue them so all four center meet in the middle.
Bend the tiny branches to fill out the crown of the tree and help position the four wings of the trunk.
- This tree will stand on its own and not require the wall for support.
- Use it in free-standing applications in Ledge Village.
I have also used this pattern to create trees for a centerpiece. Checkout the blog post and tutorial on the bases here.
**********
© 2013 Marji Roy, Ashbee Design
.jpg)


.jpg)


.jpg)

.jpg)
.jpg)

No comments:
Post a Comment