Project Description:
The Ledge Village is series of 3D buildings and accessories that can be combined in a mix and match fashion to build tiny villages on small ledges around your home. The buildings are thin, with all detail on the front so they fit on small trim ledges. Each file comes with a building and some accessories to build the village. This tutorial is for the store front and gazebo.Other files in the series include:
- 3D Backyard Necessities - Outhouse and Swing • Tutorial
- 3D Store and Gazebo File • Tutorial
- 3D Barn File • Tutorial
- 3D School House File • Tutorial
- 3D Church File • Tutorial
- 3D Cottage File • Tutorial
- 3D Two Story House File • Tutorial
- 3D Greek Revival House File • Tutorial
Here is a view of the some of the other buildings in the village arranged on a shelf.
Update 7/18/2013
Love to share!
I made the first group of ledge houses for my laundry room ledge which I shared here and here. Since sharing those cutting files via Silhouette, I have been creating new buildings for Ledge Village and trying to upload one design every week or two (yes more are coming). Several people have emailed me about the collection they are building. Yesterday I was sent a link to a photograph by Mhairi Hastings showing her creative use of my Ledge Village cutting files. She gave me permission to share the photo here. It might give you ideas on a different display technique- no ledge involved. Here is a link to her almost brand new blog Galloway Beltie Papercrafts.
She created a village in the round and added some other winterscape elements to the collection. Love it!
I will add other photos (if well done) to the site to share additional display ideas for the Ledge Village files. Send them along!
Now, on to the tutorial........
Note:
I am a new Silhouette Contributing Artist. Both my Silhouette files and this website are the beginning. Send along any suggestions, problems, ideas or photos as we learn to create together. I'd love to hear from you! Marji Roy
eMail: ashbeedesignemail@gmail.com
Tutorial assembled using Silhouette Software Release 2.7.18. This tutorial assumes you already know how to use the Silhouette and Silhouette software.
Supplies Needed:
- Template from Silhouette On-Line Store
- 3D Ledge Village Store and Gazebo here.
- Other files include:
- 3D Ledge Village Barn here. (Includes Silo and farm fencing)
- 3D Ledge Village School House (Includes picket fence and flag)
- 3D Ledge Village Church ( Includes steeple and picket fence)
- 3D Cottage (includes maple tree, laundry and picket fence)
- 3D Two-Story House (includes evergreen tree and picket fence)
- 3D Greek Revival House (includes evergreen tree and picket fence)
- Glue dots 3/16"
- Silhouette Cameo
- Card Stock
Steps for completing the 3-D Store Front Construction:
(Gazebo follows below)1. Download the cutting file for your Silhouette Cutting machine from the Silhouette Online Store here. The store front and gazebo come in the same file. I will give the storefront assembly directions first, followed by the gazebo below.
2. Prepare the files:
- The downloaded Silhouette file for the store front and gazebo looks like this. The store front and gazebo can be copied and separated. Each will fit on an 8.5 x 11" piece of card stock, or they can be left together and cut from a 12 x 12" piece.
3. Cut the files.
- The settings will depend on the paper you use. I have been using white index card stock and cutting at a speed of 3, a depth of 33 and the blade set to 4.
- Carefully remove the cut files from the backing mat.
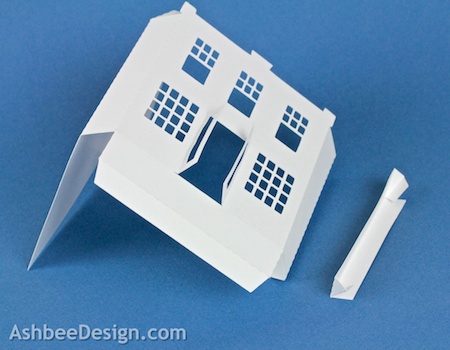
- Here are the parts for the store. There is the large building and the smaller add-on awning.
4. Fold the store and awning.
- Note each cut file has dotted lines. These are fold lines.
- Fold all the dotted lines inward and the doors out.

5. Glue the awning together.
6. Glue all seams starting at the base.
- Add a glue dot at each end to hold it in place.
- Put 3-4 glue dots on the back side of the awning and position it on the store front above the doors and windows.
6. Glue all seams starting at the base.
- I start putting the building together at the base using glue dots.
- Work to keep the edges square.
- Glue up the flat roof.
- It is placed below the front edge.
- I insert a skinny tool through the door to help press all seams together.
- There is not separate roof piece (like in the other Ledge Village designs) for the store front.
- I glued the back and side last to complete the store front.
Gazebo Construction
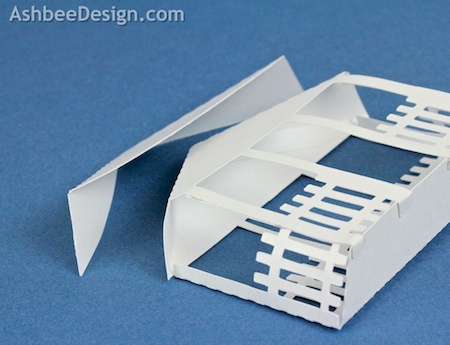
- There are two gazebo pieces, the main building and a separate roof.
- Fold on all the dotted lines.
- There are 3 folds you must make that are not dotted. The connections are too tiny to add a dotted line.
- The floor must fold up along the bottom of the railing.
- The posts on the ends of the two sides must be folded in.
- Start by gluing the roof together. Add glue dots to the tab and glue in place.
- Once the roof is together, the side walls will fold around to connect to the front.
- The posts on the end of the side walls fold in behind the matching posts on the corners of the front wall.
- Add glue dots and glue the posts together.
- The front pieces have glue tabs on the bottom of each post.
- Add glue dots to those and fold them back under the floor.
- Place carefully to keep things square.
- The roof piece gets added last. Add some glue dots and position it to provide the overhang.
And that completes the store front and gazebo.
Add them to other buildings in your ledge village.
**********
© 2013 Marji Roy, Ashbee Design


.jpg)


Hi I love you ledge town, here is what I have done with it - as I didn't have a ledge! Keep up the great work please. Galloway Beltie
ReplyDeletehttp://4.bp.blogspot.com/-axfGKKpDRk0/UeLgmV_zF8I/AAAAAAAAAI4/uIUnOvLXi98/s1600/ice+town+1.JPG
Love it! This is a beautiful adaptation using my Ledge Village designs in a new arrangement. Creative and beautifully down. May I include the photo in my post?
DeleteAbsolutely Marji - I'd be really proud if you did. Thank you! Mhairi
ReplyDeleteI am BRAND new at using my silhouette cameo. I am trying to print the church but the windows disappear when I choose to cut. Any suggestions from anyone would be appreciated.
ReplyDeleteThere is not quite enough information for me to give a definitive answer, but did you change any of the lines to no-cut lines?(I am assuming you meant that you were trying to cut them and not print them, right?) That is under the scissors icon. To fix you can remove my text labels on the file and then select all (EDIT MENU to SELECT ALL), click on the scissor icon and choose CUT. You might want to just re-down load the file in case you have changed the settings. There have been close to 2000 people that have downloaded the church file and aren't seeing the same issue you are, so I expect you changed something in the file or something happened in the download.
Delete