I have designed a shadow box for the Christmas season. As I designed my earlier shadow boxes, I saw the potential for creating a Nativity scene in this format. This project combines 7 different layers into one multi-layered Nativity. I have assembled it in two different paper choices, a variety of black, white and grays, and an all white version. Both have different display options. The all white version glows beautifully when placed in front of a window or other light source. The shades of gray version has better contrast for front lighting sources. Although visually complex, the cutting and assembly skills for this project are relatively basic.

Black, gray and white gradation

All white card stock displayed in a window with sunlight emphasizing the layers. The star shines in this location!
.jpg)
All white card stock.
Nativity Shadow Box Tutorial:
Tutorial assembled using Silhouette Software Release 2.7.18. This tutorial assumes you already know how to use the Silhouette and Silhouette software. It can be cut on both Cameo and Portrait Silhouette machines.
Supplies Needed:
- Template from Silhouette On-Line Store here.
- Glue dots 3/16"
- Paper Glue
- Silhouette Cameo or Portrait
- Card Stock (all parts fit on 8 x 10 size)
- 1 sheet light weight white paper - I used 20 lb. copier paper.
- Foam 3D sticker Tape
- Scotch Tape
- Sharpie Marker in black
Steps for completing the Nativity Shadow Box project:
1. Download the cutting file for your Silhouette Cutting machine from the Silhouette Online Store here. This file is a long, skinny file with 7 different layers included. Each needs to be copied and pasted into a separate file for cutting.
- This approach is different from my earlier shadow boxes in that you don't have to resize the files. This one makes more sense to me. Let me know which approach you find easier to work with.
- The file may be all grouped together. If so, to select just one frame portion, click on the entire file so it is selected. Go up to the OBJECT MENU and down to the UNGROUP command.
- Copy all of the first frame and any parts within it.
- Open a new Silhouette file and paste this into it. It should fit onto and 8.5 x 11" piece of card stock.
- Cut this file.
- Note on colors: I completed this project using all white card stock for one version and gradations of grays from white, through the grays to black. The tutorial is shown using the gradations because it makes the lessons much easier to understand. In reality, I like the all white version best. If you choose to do a color gradation, this is the order of my color choices:
- Layer 1: Front frame - black
- Layer 2: Sheperd and manager - dark gray
- Layer 3: Holy Family and Manger - medium gray
- Layer 4: Wise Men - light gray
- Layer 5: back frame - black
- Layer 6: Star - Black
- Layer 7: White backing for Star - White (Thin 20 Lb paper - not card stock)
- Repeat the copy and paste for everyone of the 7 different layers. Cut each one out.

- I am going to direct you through the assembly of each layer. After all are completed, I will show you how to combine them.
3. Assemble Layer 1 - the front frame.
- Layer 1 has 2 parts, a frame and and a hanger.
- All the frames have dotted fold lines. You fold them all in the same direction for each frame. For Frame 1, they all get folded toward the back.
- Apply a couple of glue dots to each corner tab and build the shadow box frame.
- Work with care to keep things square.

- The hanging tab gets glued inside the top edge of the frame.
- The tab gets bent up to be above the frame.

4. Assemble Layer 2 - the shephard layer.
- Layer 2 has 3 parts, a frame and the shepherd and sheep
- All the frames have dotted fold lines. Fold all the fold lines to the back and glue together in the same way as you glued frame 1 together.
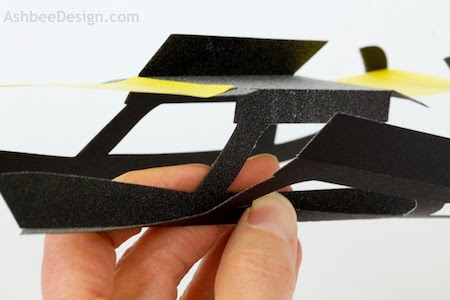
- Apply a strip of double-Stick foam tape along the back side of the frame between the manger post and the side wall. This is to position the shepherd and the lamb. The foam tape will hold them back from the front frame about 1/8" to provide another depth level in the shadow box. The purple lines added to the image below show placement.

- If using dark colors, take a sharpie marker and darken the edge of the tape so it won't be visible from above.

- Also place a short piece of foam tape on the side. Position this to catch the back edge of the shepherd's head and hold it in place.
- Position the shepherd on the tape. The foot connector should be just below the landscape line on the front and he should be positioned far enough in the edge to just catch the back of his head on the upper tape. It is about 2 1/2 - 3" above the bottom fold.

- Next, position the lamb. Again the foot connector should not be visible from the front.

- After both are in place, cover the remaining double-stick tape with regular scotch tape. This will keep it from sticking in the wrong places.

- Notice two fold lines on the roof portion of the stable. Those needed to be folded toward the BACK. There is one on each half of the roof.

- Here is a view of the completed layer 2.

5. Assemble Layer 3 - the Holy Family layer.
- Layer 3 has 1 part, just the frame with the Holy Family.
- There are fold lines along both halves of the stable roof. Fold these toward the FRONT. Add a glue dot to the tab at the peak of the roof and glue that together.

- All the frames have dotted fold lines. Fold all the other fold lines to the back and glue together at the corners in the same way as you glued frame1 together.
- Below is the completed Frame 3.

- Layer 4 has 2 parts, the frame including 2 wise men on the ridge and 1 separate wise man. The cuts on this frame are detailed and a good mat and blade are needed to get clean cuts.
- After cutting, apply a foam pice to the back of the solitary wise man....
.jpg)
- And position him on the slope in front of the other two.

- It is helpful to look at the entire composition to help with placement.
- Add a touch of paper glue under each of the the camel feet and glue them to the back surface.

- Fold all the edges of the frame toward the back and glue the corners in the same manner you did for the first frame.
- Here is the completed frame 4.

- Layer 5 has 3 parts. For Layer five you need layers 5, 6 and 7 from the original file.
- Layer 5 is the black back frame,
- Layer 6 is the rectangle with the star cut out.
- Layer 7 is the white thin paper to back the star.
- Fold all the edges of the frame toward the FRONT (opposite all others) and glue the corners in the same manner you did for the first frame.
- Then glue the white backing paper behind the black star paper lining up all edges. They should be the same size.

- The star and white background will be glued inside the back frame.

- Here is the completed 5th layer.

- All 5 layers should be each assembled before you start to combine them.

- To assemble the layers start with the back layer 5 first. This is the one with the star.
- Layer 4 (Wise Men) get placed over layer 5.
- Add a few glue dots to hold them together.
- As you assemble all the layers you will want their back edges to line up. You want them to maintain spaces between the layers so don't allow them to slide toward the front.

- Flip the shadow box over and apply scotch tape to the top and two side edges. I leave the bottom untaped to allow for a little expansion.

- Layer 3 (Holy Family) gets placed OVER layer 4, again lining up the back edges, using a few glue dots to hold it in place, and then flipping it over and taping the edges from the back.

- Layer 2 (Shepherd) gets placed OVER layer 3, again lining up the back edges, using a few glue dots to hold it in place, and then flipping it over and taping the edges from the back.
- On this layer you also add a few glue dots (I recommend reposition-able ones here) to the top of the stable roof tabs that have been folded back.
- These will be attached to the bottom of the stable roof folded forward from the layer 3 below.


- Layer 2 is the last layer to use the scotch tape. The tape gets covered by layer 1.

- Layer 1 (the front frame) gets placed over all the other layers. Only use glue dots to hold this one in place. The side with the hanging hook goes on the top.


**********
© 2013 Marji Roy, Ashbee Design
Sharing this post at some of these link parties. They are worth checking out for other ideas.
Motivate Me Monday, Mop It Up Monday, Alderberry Hill, Metamorphis Monday, Tuesday Treasures,Today's Creative Blog, A Bowl Full of Lemons, Not Just a House Wife, The Inspiration Board, Romancing on a Dime, DIY Dreamer, Whatever Goes Wednesday, Transformation Thursday, House of Hepworths, Craftberry Bush, Jennifer Rizzo, One Artsy Mama, Craftionary, Flaunt in Friday, Tater Tots and Jello, Show and Tell Saturday, DIY Showoff, I Gotta Try That, Kathe With an E, The Girl Creative