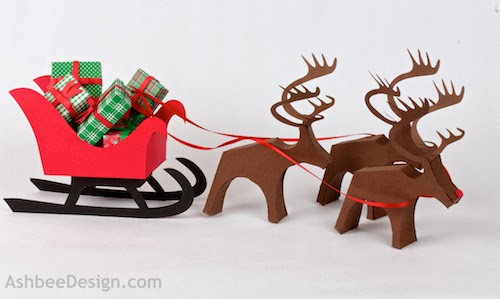
Here is a cutting pattern and tutorial for a 3D Reindeer that stand about 6" tall. He has been designed to be combined with the 3D Sleigh and 3D Presents files as well. These 3 files are proportioned to work together. All are both Cameo and Portrait friendly. This tutorial is for the reindeer pattern. This reindeer can be Rudolph by adding the included red nose. This project does require nimble fingers.


And here they are in all white......


- The tutorial for the sleigh is here. Cutting file for the sleigh is here.
- The tutorial for the reindeer is here. Cutting file is here.
- The tutorial for the presents is here. Cutting file is here .
Tutorial assembled using Silhouette Software Release 2.7.18. This tutorial assumes you already know how to use the Silhouette and Silhouette software. It can be cut on both Cameo and Portrait Silhouette machines.
Supplies Needed:
- Template from Silhouette On-Line Store here.
- Glue dots 3/16"
- Silhouette Cameo or Portrait
- Card Stock
Steps for completing the Reindeer project:
1. Download the cutting file for your Silhouette Cutting machine from the Silhouette Online Store here.
- You need to decide on the card stock and colors you want to use. I have done it in all white as well as colored card stock. The tutorial is shown using brown card stock.
- If creating Rudolph, copy and paste the nose piece into a separate file and cut that from red card stock.
- Cut your pieces from the card stock you choose.
3. Assemble the reindeer
- Apply glue dots to all edges of ONE reindeer side.

- Cover the glue dots with the glue dot backing plastic as you work. Glue dots stick so well they tend to stick to places you don't want. This step will help control that.

- Prep the reindeer side that includes the back and head. It is labeled side 1 on the cutting file.
- Start by pulling the sections that will line up with the next and face over a sharp edge. This is to give them a curve and they curve in the same direction.

- Fold in all the tabs along all four edges of this piece. They fold in toward the curves you created above.

- Glue together the top of the head and the end of the nose before attaching this piece to the reindeer side. It is easier to manipulate the tiny corners on the edges before it is connected.
- The top of the head is the small area between the two curved sections.
- Place glue dots and fold and glue the tabs in to create a square end for the top of the head. Do this to both sides of the edge section.

- Do the same for both sides of the edge end that will be the reindeer nose.

- Now start lining up this folded edge piece with the side you placed all the glue dots on.
- Start at the top of the head. It is extremely important to note that the piece gets attached below the little tab that looks like ears (They aren't. They are functional tabs to help hold up the antlers later.) This first picture shows how the top of the head gets placed down at the bumps on the tab. Leave the tab sticking up above.

- Remove the piece of plastic covering the glue dots on the head.

- Stick the top of the head in place and then start working down the face toward the nose.
- Position the nose and stick in place.

- Next start back at the top of the head and work down the curve of the neck carefully lining up the side piece with the curve.
- Slide off each piece of protective plastic as you need access to more of the glue dots.

- Continue down the back and down the back leg. Those are both easy because they are straight lengths.
- Press the glue dots securely as you move along.


- Next, prepare the piece marked as Side 2 on the download template.
- First pull the 2 portions that line up with curves over a sharp edge to curve the paper.

- And then fold all the tabs away from the curve.
- Just like on the first side, build the small bends (hoof end) in the middle first.

- Side 2 is ready to be attached.

- Put two glue dots on the tab on the bottom of the back leg hoof.
- Attached side 2 to side 1 at this tab on the bottom of the back leg.

- Add a few extra glue dots to the inside of the back leg. All the original glue dots got covered by side one and side two needs a few as well.

- Now start positioning the belly.
- Fold and shape the back hoof.
- Place the hoof of the front leg and then work the space between the two legs working to create a nice seam.


- Add a glue dot to the tab at the nose end and attach side two to that.
- Work in the underside of the neck and down the front leg.
- Remove the plastic as you need access to more glue dots.

- Both side 1 and side 2 are connected to one half the reindeer.

- Now add glue dots to every tab that will be attached to the other body piece.

- Cover them with the plastic protector sheets to allow you to control positioning.

- Starting again at the top of the head, remove the plastic and position the body. Stick it in place.

- Work down the face to the nose.

- Continue under the neck and down the front leg.

- Continue along the back, across the belly and down into the back leg.

- If the legs sides are a little long, take scissors and trim the edges off. I left a little extra to allow a little flexibility in positioning the belly.

- You should still have the two little "ears" sticking above the head. The antlers will get glued in between them.

- Fold the antlers on the dotted fold lines and place 2 glue dots on the bottom of the connector piece.
- Position it between the support tabs and glue them in. The smaller antlers go toward the front.

- If this reindeer is going to be Rudolph, add the red nose.
- First fold it, aligning the two red circles but leaving the tab between them as flat on the bottom.
- Put a glue dot between the two halves.

- Add another glue dot (cut one in half) to the bottom and add the nose to the reindeer.

Make the other items for the complete arrangement. You can make as many reindeer as you want, especially if you have space for the entire crew!
**********
© 2013 Marji Roy, Ashbee Design
No comments:
New comments are not allowed.