Project Description:
This shadow box is composed of 3 cut files assembled in layers to create a branch environment for butterflies to hide. The download includes the cutting files for assembling Monarch butterflies as well as the shadow box. I have created this same series of files in several different paper combinations to show you the potential. First, I made a series in vibrant, natural colors.....jpg)

And then I made another in all white.....


Note:
I am a new Silhouette Contributing Artist. Both my Silhouette files and this website are the beginning. Send along any suggestions, problems, ideas or photos as we learn to create together. I'd love to hear from you! Marji Roy
eMail: ashbeedesignemail@gmail.com
Tutorial assembled using Silhouette Software Release 2.7.18. This tutorial assumes you already know how to use the Silhouette and Silhouette software.
Supplies Needed:
- Template from Silhouette On-Line Store here or from 3dcuts here.
- Glue dots 3/16"
- Silhouette Cameo
- 3 sheets of 12" x 12" Card Stock - Colors or white
- Spray Adhesive
- Permanent Black marker
- Blue Tack Wall Adhesive (optional)
Steps for completing the 3-D Butterfly Shadow Box project:
1. Download the cutting file for your Silhouette Cutting machine from the Silhouette Online Store here or for other machines here.. All of the patterns for this project are in Silhouette download. They need to be separated and expanded. Below are some detailed instructions with photographs.2. Prepare the files:
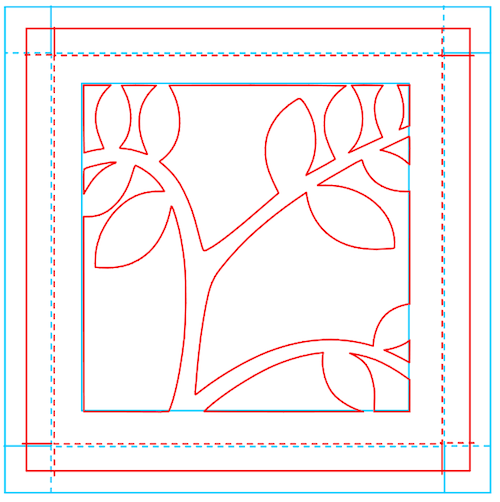
The downloaded Silhouette file looks like this. Each of the 3 frame parts has to be copied, pasted into a new Silhouette file and enlarged. Continue for more hints on doing this.
Important note; In the Silhouette file, layers 2 and 3 are labeled incorrectly. They are reversed! Just found out 1 year later! (Thanks Linda!)

- The following technique will assist you in getting the inside frames sized correctly.
- Copy the front frame (layer 1) from the original download and paste it into a new file. Enlarge to the size you want your final project to be. I enlarged it to 9.250" square inches. Notice the dotted fold line. This dotted line is key in correctly sizing layers 2 and 3.
- To duplicate my shadow boxes exactly use the following sizes:
- Layer 1 - 9.250 " square
- Layer 2 - 8.260" square
- Layer 3 - 8.190 square
- Cut layer 1 in card stock. Cut settings will depend on your card stock thickness. I used speed of 3, depth of 33 and blade set at 4. This is the frame and for the colored version, I cut it in black.
- The following steps guide you in correctly sizing the frames for different sizes than mine.
- After cutting, select everything (EDIT MENU to SELECT ALL) for the layer 1 file and change the ink color to blue. This step is optional but it helped me from getting confused. Below are the settings in Silhouette for changing color. Select the line tool and then choose a color.

- Return to the original file download and copy layer 2.
- Paste this copy ON TOP of the first file you just turned blue and resize it so the dotted square is slightly smaller. (This dotted square is the fold line when assembling the box.) If you are matching my size, I sized layer 2 at 8.260" square.
- Notice how the large dotted fold square of the 2nd layer (red) is slightly smaller than the dotted square of the 1st layer (blue). You want to do the same. If you are using thicker card stock you will want more space here.
- Note: I increased the thickness of the lines so this image would show well on your screen. You do NOT increase the line thickness.
- Once the size is appropriate, click on the back frame (blue in my sample) and delete it. You are left with the correctly sized middle layer (layer 2).
- Cut it out on your Silhouette.
- Repeat by turning layer 2 blue and bringing in layer 3.
- Reduce it to be slightly smaller than layer 2. I used 8.190" for my sample.
- Delete layer 2 and cut layer 3.
4. Fold boxes.
- Note each cut file has dotted lines. These are fold lines.
- Fold layers 1 and 2 BACK and fold layer 3 UP.

5. Glue Corners

7. Cut and assemble the butterflies.


- I like to use Glue Dots on the corners although other glue types are appropriate.
- It is important to make square corners.
6. Assemble all three frames.
- The back layer (3) slides into the middle layer (2), and both are covered by layer 1(black).
- Place glue dots between the layer frames to hold them all together. Position the back layer with in the front layer so that is place as far back as possible. You want to maximize the space between the layers.
7. Cut and assemble the butterflies.
- I have created shadow boxes with 1, 2 or 3 butterflies. The file comes with 2 patterns. These 2 are cut at this size to match the dimensions I noted above.
- Notice the larger one. It has more detail. It can be resized larger.
- The smaller design is simpler and works better in smaller sizes. For the colorful shadow box I made two of the smaller butterfly, one I reduce in size.
- Each Butterfly requires 2 lacy wings and 2 solid wing halves to be cut. Copy the appropriate files to a new file, duplicate and resize.
- Choose your paper carefully for the lacy wings. Paper that has a lot of fibers tends to not cut well. A smoother card stock is more appropriate.
- Cut the files.
- Work carefully to remove the butterfly from the cutting mat. It is delicate. I found working with a worn-in mat (not too sticky) helps.
- Spray the backside of one lacy wing with adhesive.
- Carefully place the inner wing on each half.
- Work to line up edges.
- Spray adhesive on to the 2nd lacy butterfly and place it over the solid wing piece creating a 3-layered butterfly. Pay close attention to the antennae working to line them up.
- If you have used black for the frame, take a permanent black marker and color any yellow showing on the edges. This step isn't necessary in a solid color version.
- Fold each butterfly wing up, leaving a flat surface between them. This is not a hard crease but a gentle fold.
- Use a tiny glue dot and glue the heads of the two halves together.
- Repeat this with the two tail pieces. I had to cut glue dots in half so they would fit.

- Spread the antennae.
- And bend the wings down.
8. Attach the butterflies to various locations on the shadow box.
- I used glue dots to position the butterflies. I like it with one of them positioned partially out of the frame.

9. Place on the wall.
- I use Blu Tak or a similar product to attach to the walls with a material that doesn't damage the wall and is easy to re-position.
**********
© 2013 Marji Roy, Ashbee Design
Love this, thanks for the tutorial, can't wait to try it.
ReplyDeleteThanks, Send pictures when you do!
DeleteThis comment has been removed by the author.
ReplyDeleteYes, it is a coincidence. Your use of vellum for the wings is a great idea. I like it.
DeleteHi Marji, love this frame with the butterflies, I want to make it, but I own a silhouette Portrait. Is it possible to make this frame with the Portrait? If yes what will the measurements be?
ReplyDeletethanks in advance.....
It says on the Silhouette website that a portrait has an 8" cutting mat. Can it cut to 8" wide? If so try layer 1 at 7.75", layer 2 at 6.9", and layer 3 at 6.82". Comment back if that works. Marji
DeleteHi Marji, the portrait can cut 8"wide. I try it out at the measurements you give me. and Yesss it works..... thanks a lot!!
Deletethe frame is 6"x6" and the inside is 5"x5". A very cute frame!!
Thanks...
Crafters, I received the following comment directly from a fellow crafter that added a back to the shadow box. I am adding it here because you might want to do the same. Marji.......
ReplyDeleteThank you for your 3D butterfly shadow box design. I really like that all the pieces are part of one cut file so I don't have to buy 3 or 4 files to make your design. I also like that you had a link with instructions. Sometimes it can be difficult to figure out how something goes together so I really appreciate that too. And the extra information on how to resize them for myself was really helpful too because I want to make one as large as I can with my 12 x 12 card stock.
I did do one thing extra on mine when I made it. I wanted a back in the box so I went back to the files and using layer two I ungrouped and removed the leaves from the center and cut out a solid box shape. I then folded it forward put a little glue around the edges and inserted it in the back. It added another dimension and gave a really nice finished background to the piece. I originally did this with a white piece but it could be done with a color, texture or even a print piece.
I posted a picture of the one I made on my facebook page and of course gave you credit for the design and added a link to your web page so others can find you.
Anyway, thanks for the project and I look forward to seeing more of your designs.
Kate C
www.facebook.com/happy2bestampin
This comment has been removed by the author.
ReplyDeleteJust discovered you in the SIL store, LOVE your 3D files and this shadow box project is fantastic, can't wait to try it, thank you for such a clear tutorial. Most of the files in the SIL store are challenging to put together the way they come. I have to say I love the way you spell your name, I've never found anyone else who spells it the same :D
ReplyDeleteHello Marji!!!!! I too have rarely seen our name spelled this way. I am a Marjorie but hated that so many, many years ago in JH I decided to tray and modify it to a cooler version - hence Marji. My husband complains because Siri can't seem to learn it! Welcome to my Silhouette passion and thanks for taking the time to comment. More shadow boxes to come!
DeleteI am making the butterfly right now, for my Mother's Day card this year...and am hoping it can be mailed without getting crushed. I am sending a gift and plan to cushion this the best I can. Adding it to a box card. I'll send a photo if I can remember to.
ReplyDeleteWrap the shadow box in tissue and put it a small box. Include in the box with the other gift. I think it should travel fine. Love to see a finished picture.
Deletelove anything with butterflies, beautiful and thanks for the instructions
ReplyDeleteI love butterflies as well! Just uploaded this design to my new website at 3DCuts.com. It is available there for those of you that need it in .svg format.
Delete