Project Description:
I have just returned from our summer vacation travels and it provided my inspiration for the weekly 3D shape. What can be more appropriate for mid summer than a classic Adirondack chair? It works at the beach or in the mountains. And they have started making them in so many glorious colors as well!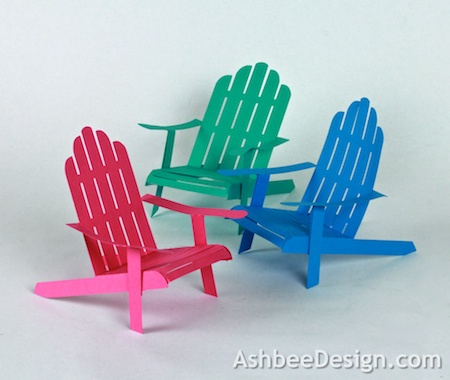

The finished chair stands about 4" tall and can be cut from a single 8.5 x 11" sheet of card stock so those of you with a Silhouette Portrait can use this pattern as well.
Use these little chairs as seasonal decor on the end table, clustered with a few shells as a table centerpiece, or as name holders for a picnic. They are as classic as the original.
Note:I am a new Silhouette Contributing Artist. Both my Silhouette files and this website are the beginning. Send along any suggestions, problems, ideas or photos as we learn to create together. I'd love to hear from you! Marji RoyeMail: ashbeedesignemail@gmail.comTutorial assembled using Silhouette Software Release 2.7.18. This tutorial assumes you already know how to use the Silhouette and Silhouette software.
Supplies Needed:
- Template from Silhouette from 3dcuts here.
- Glue dots 3/16"
- Silhouette Cameo or Portrait
- 1 sheets of 8.5 x 11" Card Stock for each chair
Steps for completing the 3-D Adirondack Chair project:
1. Download the cutting file for your Silhouette Cutting machine here. The file is quite simple, just two pieces.
- Use card stock. Cut settings will depend on your card stock thickness. I used speed of 3, depth of 33 and blade set at 3.
- Remove the pieces from the sticky mat. Proceed with care because there are several places that are easy to tear through.

- Here are the two cut shapes.

3. Fold and assemble the chair seat.
- Note each cut file has dotted cut lines. These are fold lines.
- The two side rails get folded DOWN and the seat back gets folded UP along the dotted lines.

- Notice the two little tabs on the sides at the front of the slatted seat. These get folded down as well and will hold the seat front in a curved shape.

- These get glued to the back side of the curved front edge of the side slats.
- Put 2 glue dots on the back-side of the side slat.

- Curve the chair seat down and around sticking the little tabs to the glue dots.

- Do this to both the left and right sides of the chair seat front.
4. Fold and assemble the chairs arms and legs piece.


6. Attach the side arms to the seat base.


- The remaining piece includes both the chair arms and front legs connected by a back brace.
- There is a long tab on the back brace that needs to be carefully folded up.
- The short leg pieces in the center need to be folded up.
- The 2 longer leg pieces need to be folded up and then out as shown below
- The short leg pieces get glued (using 3/16" glue dots) to the longer leg pieces on each side as shown in the photo below.
- Do this on each side leg.
5. Attach the arm/leg piece to the chair seat piece.
- Attach a row of glue dots along the folded tab of the back connector on the arm/leg piece.
- Position this behind the lower brace on the chair back with the tab facing down and the legs toward the front facing down.
- The top edge of the cross brace on the arm piece will line up with the top edge of the bottom brace cut into the chair back.
- Be carefully to have the brace straight before pressing into place.
6. Attach the side arms to the seat base.
- The front legs now get attached to the sides of the seat base using glue dots. The positioning here is tricky so proceed with care.
- If you look carefully, you will see a tiny tab extension on the lower side of the side rail. The front of the leg lines up with the front of that notch.
- You want to position the leg so that the arm of the chair is level and not buckled. You may need to play with the angle and the height.
- Once you have established the correct location, glue it into place with a glue dot.
- Do the same positioning with the opposite leg.
- Be careful here because you want the two sides to match.
- You can trim the bottom of the legs a little bit if the chair is wobbly.
Now look at all your card stock in summery colors and create a collection of chairs for display!
**********
© 2013 Marji Roy, Ashbee Design
wow how cool! These are awesome
ReplyDeleteKind of fun and funky. Makes me miss summer!
ReplyDeleteThank you for posting this. I was wondering how to put one together.
ReplyDelete